Winch Maintenance
A guide to dismantling and cleaning your winches from Harken's technical expert Mike Lee.
Mike Lee is the technical expert at Harken’s Newport Rhode Island office. He works closely with naval architects, boat designers, and boat captains, specing custom winch and hardware packages, and figuring out the best deck layouts for the projects.
A Milwaukee, Wisconsin native, Mike has been in the marine industry for over 17 years and at Harken for eight. For many years he sailed big boats in the Milwaukee area, but admits he’s addicted to speed. “I sailed a Hobie 16 for a long time until one day a sailboard shot past me. I also satisfy my need for speed by sailing iceboats.”
Greasy and messy
If you’re like most sailboat owners, you haven’t serviced your winches since you owned the boat. Every year you say this is going to be the year you clean and grease them, but something more important always comes along.
Without sugarcoating the job, cleaning winches is a greasy, messy, pain in the arse that intimidates even the most boat-savvy person. However, winches need to be greased because they are among the most expensive items on the boat!
Abstract Puzzle
Every winch is different, so there’s no good way to memorize how a winch goes back together. However, a winch can not be put together wrong because the parts only fit together the right waywith the exception of maybe getting a washer in the wrong place. While I’m trying to piece my winch back together, I like to think of it as an abstract puzzle. If you do find yourself in trouble, you can download a parts breakdown off Harken’s website. www.harken.com/winches/winch.php
Getting Ready
It’s a good idea to have everything handy before you start because you’ll be too greasy to dig around your clean boat for needed items: lots of paper towels, mineral spirits, coffee can, small paint brush, winch grease, tools including metric Allen wrenches, access to hot water, and cold beer.
The paper towels let you keep the mess under control. Pour the mineral spirits into the coffee can and use to clean parts with the small paintbrush (after cleaning, rinse all the parts in hot water). The cold beer … well hopefully you know what to do with that. Beer can also induce a friend to help you clean a winch or two.
 Disassembly
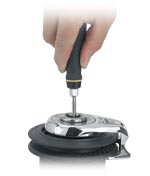
To disassemble, remove the drum from the base of the winch using the screw at the bottom of the winch handle socket. Simply unscrew it, pull the socket out, and the drum will lift off.
As you lift the drum, be aware the roller bearing cages may momentarily stick inside the drum and could unexpectedly drop out. Make sure they don’t bounce off the deck into the water.
Now you can remove all the gears and bearings for cleaning. Even though the winch only goes back together one way, it won’t hurt to take a good look at everything. Most importantly, remember where the washers and other little items go. It’s hard to figure out their location. Don’t waste time worrying about the larger gears and drive shaft. It’s easy to find their homes. Pulling the gears and bearings out is actually quite simple and doesn’t require any tools or skill. They just slip over the gear shaft.
 Cleaning
Take the gears and bearings and place them in a coffee can. Cover the parts with mineral spirits and soak.
After soaking, take the small brush and work the old grease off the part. Don’t forget to clean the gear ring on the inside of the drum.
Now that you’ve removed the grease and grime, rinse the parts in hot water to remove the mineral spirits. If the spirits are left on, it breaks down the grease.
 Reassembly
As you put the gears back into place, take a close look at how the pawls are working. If they don’t open and close smoothly, then the drum could spin backwards. If there’s any question that the pawls are not working properly, it is much easier to replace them and the little springs. It is very important NOT to grease the pawls because grease causes them to stick. And if they stick, the gears won’t engage. To lubricate your pawls, use any light oil that might be on hand; something like a 3 &1 oil.
The final step is to place all the winch parts back into the base where they belong. If you do end up with extra parts, you’ll have to go back through each part and play detective until its home is discovered. Also, it’s not a bad idea to periodically give the shaft and gears a spin to make sure you are on the right path. Remember, in most cases winches are used in pairs. Clean one winch at a time. If you become confused as to where a part goes, you can look at its mate for the answer.
Final Touches
Once you are certain the winch is reassembled correctly, lightly brush on some clean winch grease. Some owners think that because they won’t get around to servicing their winches for a long time, the smart strategy is to pack them with so much grease they will last for years. This is a bad idea and only makes a big mess down the road.
Now that the gears and bearings are all in place with new grease, all that needs to be done is to remount the drum.


